In the last while I have taken an increasing number of calls about electric fencing. I think this is largely due to lack of rainfall in a lot of areas, but also a renewed interest in adding productivity to pastures and forage. Another big reason is that electric fence can be significantly cheaper to install and maintain than barbed wire.
I remember that as a kid several decades ago we purchased a fencer from Australia and started building electric fence. Over the years, we have done a lot of learning (lots of times the hard way) about what works or does not work so well. Currently, we have miles and miles of electric fencing and are constructing more all the time. In the interest of hopefully saving you from some of our mistakes, I will try to cover some of the big and basic parts of an electric-fencing setup.
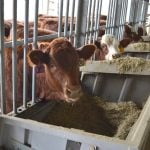
An electric fence works by sending a pulse of current (volts) down a wire. This pulse is important, as it provides the shock but also allows for the muscle release that lets the animal escape the ‘zap.’ Your regular electrical wire (like the one to your house) has a constant voltage and if you were to grab it, you would be unable to let go. When an animal touches the fence, it acts as a switch, turning on the circuit so the pulse goes through it into the ground and returns to the fencer through the grounding system, thus completing the circuit and the zap. Electric fence is all about getting that current to and through the cow. (Figure 1).
Read Also
Get ready for an eventual transition on cattle traceability
When new federal cattle traceability rules do ultimately take effect, reporting requirements will vary for producers, transporters, feedlots and markets — but most of the onus will be on producers.
The amount of electricity that flows through the wire is voltage and the fencer provides the flow in joules. When we have a fault, or a cow touches the wire, the current flows through the animal, drawing amps from the system. If the system is leaky or losing amps, the voltage will drop and it won’t stop a cow. A rule of thumb is that it takes 4000 volts (4KV) to stop a cow. I can tell you from experience that four works, but eight is better.
Grounding/ starting at the end
It might seem logical to blame the fencer, but the reality is that the reason most electric fences fail to contain livestock is due to the grounding system. Ground rods need to be in the ground at least 10 feet apart from each other and should be high-quality galvanized rod. (Figure 2)

Rebar is NOT an acceptable ground rod. A good rule of thumb for permanent fence is that you should have five feet of rod in the ground for every joule of fencer you run. A three-joule fencer would have 15 feet of ground rod. Ten feet is better yet. The rods need to be firmly connected to each other and back to the fencer, preferably with galvanized wire and even a clamp. On our place we have some big fencers with over 180 feet of galvanized ground rod. They work in even the driest conditions.
If you have very dry or sandy soil, you may need to locate the rods in a damp area, or even pack them in with bentonite clay. As well, there are some other options for ways to set up a fencer, such as using a bipolar setup which is beyond the scope of this article but can be used for tough conditions.
Wire, insulators and tensioners
Many producers don’t like high-tensile wire, but it is a low-cost and high-quality way to build an electric fence. A lot of the issues arising with high-tensile wire come from the fact that we over-tighten it to stop cattle in the same way we do with barbed wire.
If wire is properly tensioned, you should be able to step on it between the posts and have it touch the ground. (Figure 3) This provides the needed ‘give’ so that it provides an extended period of contact with the animal and ensures a good shock.

I see a lot of electric fence built with barbed wire and this is 100 per cent not recommended. There are a couple of reasons. One is that the wire does not provide the stretch/contact time of high tensile. The second is that the barbs can catch on the animal and prevent it from releasing from the shock.
Barbed wire is a physical barrier, while electric fencing is a mental barrier. We can control our animals using a single wire and occasionally I have found that I forgot to turn the fencer on (sometimes for several days). The cattle could cross easily but don’t because of that mental barrier. This shock aversion even works on ranchers.
It is really important to use good-quality insulators to keep the wire off the posts (or use insulated posts such as fibreglass). A lot of folks skimp on this, but not using insulators can create a large drain on the fence, particularly in damp weather when contact with wet posts can really draw down the current on the fence.
I don’t have a personal preference for tensioners, but over time we have moved to inline tighteners for our fences. They are fast and easy to install. The one piece of advice is to use the same style across your fences. Different tensioners use different tools, if you are like me you want to carry as few tools as possible.
As well, on multi-wire fences make sure the tensioners are not lined up with each other. If an animal happens to run through the fence or strong wind bounces the wire, it can tangle together at the tensioners. (Figure 4).

One of the biggest mistakes we have made at our farm is putting on too many wires. Most of our internal fences are now being downgraded to single wire as it more easily allows young calves back and forth underneath and still stops the livestock.
Braces/ posts
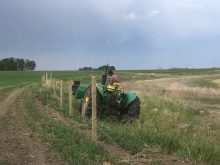
Braces depend on your soil, length of fence and number of wires. We have fairly heavy clay soil on our farm and we primarily use a single five- to six-inch eight-foot post driven four feet into the ground to anchor our corners.
Remember, we are not using the same tight wire as when we construct a barbed wire fence. If the fence is a long stretch, multiple wires, or you have sandy soil, you may need to build a brace. Everyone has their favourite type of brace — the key is to keep the hot electric wire from grounding out on the wires used to pull the brace together.
One other mistake we have made is putting posts too close together. While terrain will determine a lot of the post location, we have found it is a far bigger challenge to maintain fence when the posts are too close together, rather than when they are farther apart. On level ground we roughly use 20 running steps between posts (approximately 60 feet).
Fencers
There are many fencer options. A good fencer combined with a good ground drives the system. Nowadays you can buy fencers with Bluetooth, remote controls, solar power, and any number of other features.
What you need to focus on with a fencer is output joules (how big a pump you are buying). It is recommended that you buy a fencer that is at least one model larger than the fence you are planning. We have never regretted oversizing a fencer.
As well, you should look for a recognized brand name (there is a difference) and the fencer should be plastic. I know this seems very counterintuitive, but in our Canadian climate, temperature fluctuations (frost) can create condensation and there are moisture issues for fencers with metal covers.
As a general rule, when water and power mix, the outcome is not desirable. We have switched over time to using fencers with remote-control fault finders and while sometimes costing a bit more, have never regretted the upgrade. Having a tool that can immediately take you to an area of concern and allow you to turn the fencer on/off and conduct repairs is a great time saver. Fault finders trace if/where a fence is losing voltage (amps). (Figure 5)

Often fencers may be rated for miles of fence. This not only implies a proper grounding system, but it is also important to remember that this refers to miles of insulated electrified or hot wire, not necessarily miles of fence. If a mile span has four electrified wires, it is equivalent to four miles of fence.
Planning and temporary fence/ ending at the start
There are a lot of nuances and tricks to electric fencing. When we start to subdivide pastures, some degree of planning is helpful. Items like water sources and gate locations become really important.
We use a lot of temporary fencing tools on our operation to help subdivide, but also to design new paddocks. I am 100 per cent certain that if you build a permanent fence and the gate is in the wrong location, it will still be in that location 10 years from now.
Using temporary fence avoids a lot of these issues. If a fence has been in the same “temporary spot” for a couple of years, it is pretty safe to install a more permanent replacement. There are a lot of good free tools such as Google Earth that can also let you map out your pastures ahead of time. It is a lot easier to redraw a line on the computer than to roll up ½ mile of fence that’s in the wrong spot.
When investing in temporary fencing, infrastructure is less expensive, but it requires more labour than permanent installations. If you are using polywire, be sure to invest in the high-quality variety with tinned copper or stainless steel wires, so that you do not lose current down the fence.
The end game
At the end of the day, the goal with any fence is to control grazing behaviour and animal movement. Electric fence offers a very low-cost and effective method for doing this. While the first step should always be planning, making sure to focus on a good grounding system and working through the details can greatly help with the success of an electric fencing project.
Changing our mindset or realizing some of the differences from more traditional fencing methods is also helpful to avoid difficulties. There are a lot of really good resources online for tips and tricks on everything from new products to tying off wire or constructing braces. Hopefully, some of these hints and descriptions can be helpful for your projects at home.