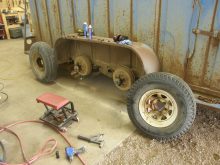
Spring isn’t that far away and if you have time this winter it may be an opportunity to look to maintenance on the equipment, tools, and facilities necessary to help provide a safe and productive year in the cattle business.
One item we easily overlook is the stock trailer we use periodically throughout the year and otherwise sit parked out of the way — silently waiting for the next time we need it. It won’t be long before cattle need to be moved to spring and summer pasture, and horses are hauled to move and check the cattle. A few minutes spent inspecting your stock trailer before you need it can save you much grief later.
Read Also
How a single-store family-owned ag equipment dealership prevails
A family-owned, single-store farm equipment dealership is increasingly rare. But the Sowa family at Wadena, Sask., say they have no plans to change thebusiness model.
Use a systematic process to examine and service the trailer. Beginning with the hitch, check to be sure there are no loose bolts or broken welds. Pay special attention to door latches and safeties.
To inspect the lights and electric brakes you will need to attach the tow vehicle to the trailer. Once the tow vehicle is attached, turn on the headlights of the tow vehicle. Walk around the trailer and check to make sure the marker lights and taillights are working correctly. If the marker and taillights are not working, use a multimeter or test light to check the electrical outlet of the tow vehicle for power. If you have no power at the tow vehicle, check for corroded connections in the outlet and wiring problems in the tow vehicle. If you have power at the tow vehicle power outlet, check for corroded connections in the trailer’s wiring plug, damaged wiring in the harness, or bad ground wire connections in the trailer.
If some but not all of the lights work, begin checking bulbs in the non-functioning marker or tail lights. If the bulbs are good, check the wiring to the individual light affected.
To check the brake lights and electric brakes themselves, you will need another person to help you. With a helper activating the brake pedal, verify that the brake lights are functioning properly.
We now move to one of the most vital series of components of a stock trailer, and one that is easily overlooked — tires, wheel bearings, and the physical components of the brake system. It can be hard to judge the life left in a tire based on the tread. Many tires that appear to have much life left may be 10 or more years old. While the tread may appear to be fine, weather checking — damage from oxygen and sunlight — has hardened or cracked the rubber. If the tires are old or beginning to crack at the sidewall, replace or carry adequate spares. Always make sure the tires are properly inflated. Heavy trailers should have a minimum of 10-ply tires inflated to 70-80 psi. Low air pressure will cause the tires to heat and come apart.
In order to service the bearings and inspect the brake drums, shoes, and activation mechanism you will need to remove the wheel. Remove the dust cap to reveal the castle nut holding the bearings and hub on the spindle. Remove the castle nut and carefully work the hub off of the spindle. The outer bearing may fall out of the hub as it comes off of the spindle. Be careful to catch it and keep it clean.
If the inner bearing and grease seal remain on the spindle, use a chisel and carefully work them loose, making sure not to score the spindle where the bearing or seal seat. Once you have removed the inner bearing and seal, clean and inspect the condition of the spindle. Run your fingernail along the length of the spindle from the seal seat to where the outer bearing rests. If the surface is smooth, the spindle is good. If you feel ridges, replace the spindle.
At this point you have exposed the brake shoes and drums. Check the drums for excessive wear, cracks, or scoring. If the drums are damaged, replace the drum/hub before reassembling. Next inspect the brake shoes. If they are coming apart or the rivets are wearing into the drums, replace before continuing. Also, inspect the mechanical components of the brake activation system, including the electric magnet. If any of these components are worn, bent, or broken, replace them.
After repairing the brake system, or verifying that it is in serviceable order, inspect the condition of the bearings and seal before reassembly. If the seal appears cracked or rotten, replace. Seals are inexpensive. If in doubt, replace the seals. Clean the bearings in solvent and inspect them for damage. Make sure the cages are not dented or damaged. Look closely at the rollers for scoring or discolouration — an indication that they have been hot. Run your fingernail over any suspicious blemish. If you feel a ridge or groove, replace the bearing. Wheel bearings can be matched at your local auto parts store. Check the inner and outer races for discolouration and scoring. If they are damaged, replace them.
Pack the bearings by hand before reassembling. Cup a glob of high-quality wheel bearing grease in the palm of your hand and grip the bearing between the thumb and fingers of your other hand so that you can look through the hole in the centre. Pat the edge of the bearing repeatedly into the grease with a downward scoping motion. You will see the grease working into the bearing. Work the bearing around in a circle until you have packed all of the rollers in the bearing.
Finally, be careful not to overtighten the castle nut when you reinstall the hub. Run the castle nut up snug, working the hub back and forth as you go. Back the nut off, wobble the hub again, and then run it up snug. It is important not to run the nut up so tight that there is much resistance when you rotate the hub. Next, back off the castle nut until you can line up the cotter pin or tab in the tang washer. Reinstall the dust cap and wheel.


